I am so brain dead sometimes. For months now I have been searching for the perfect business card design online for my craft business. It finally dawned on me that I have all the materials to make my own. Why should I spend $30 or $50 dollars for only one design I only kind-of-like when I can create custom made cards whenever I want for less than $5. I can make multiple designs at once and switch them up anytime I feel like it. I guess there was a reason deep down that I never settled for buying business cards online....I hadn't made my own yet. So here is a little tutorial on how to make your own business cards.
Step 1: Gather your materials
3 sheets of 12x12 card stock (choose a light color so the writing will be easy to see)
3 sheets of printed card stock that has semi small patterns that will look good once you cut it down to business card size
Paper cutter
Ruler
Corner punch
Glue stick
Step 2: Cut out your printed card stock into 3.5 x 2 inch rectangles using your ruler and paper cutter
Step 3: Print out your logo/information onto the plain sheets of card stock. I used Photoshop to do this but it can easily be done in Word or Open Office. I used Papyrus text for mine. If you want to explore fun text options, http://www.scrapvillage.com/ offers tons of different fonts for free. I use this site all the time when I am working on invitations or scrapbooking.
Step 4: Use a corner punch to add some creativity to your card. I bought mine from Michael's and it had 3 different designs to choose from. Make sure you line your cards correctly into the punch or else it will come out lopsided.
This is the step that you can really get creative. Instead of a corner punch you could punch another little shape that is relevant to your business or use a stamp to add a flower, bird, whatever.
Step 5: Assembling
Use the glue stick to glue your information onto the patterned card stock. Add another patterned card stock piece on back for thickness and for more design detail. If your cards curl up after you glue them, stick them under a heavy book for a few minutes to flatten them out. Once your cards are assembled use the paper cutter to trim any uneven edges when the paper didn't line up all the way.
This project probably took 2 hours from start to finish once I figured out what paper to use (that part took several weeks to decide). Now I have three different designs to hand out. I even made a Christmas business card for the Holiday season.
This one is for my Christmas crafts
This card is for my sewing designs
And this one is for all my general projects that I create
May 16, 2011
Garden Journal: May 11th
This Spring I am going to try and write an online garden journal. Last year I tried a hand written journal but I have a tendency to get bored with journals and forget them after about a month. I did better then usual last year, I managed to write in it for 9 months straight before I lost interest. This time I am trying something different. Since I can add photos to an online journal I think I will have more fun and better documentation this way. I also wanted to share my garden projects with my readers in hopes of inspiring someone.
This past weekend I purchased 9 bags of soil and tons of plants and veggies to start my gardening. Although we had pretty nasty weather on Sunday I found motivation between rain storms and ran outside while the sun was out and finished more than I thought.
Sunday I planted my veggies for the year: sungold, brandywine and early girl tomatoes, bush beans, zucchini, butternut squash, eggplant and some marigold to deter pests from eating my plants.
I also hung a beautiful hanging basket and planted some impulse buy flowers to make some flowering pots that will hopefully attract the hummingbirds. I will take a photo of it when its not raining outside.
While I was out in the garden I discovered a new garden pest. Gardeners already have deer, slugs, aphids, squirrels and rodents to deal with. I think I found one of the most destructive pests of all and she goes by the name of Charlotte! Being a puppy she likes to dig in the dirt and mud, which is no big deal. She also like to snip off blooming tulips and daffodils and jump into plants and destroy them. She has already ruined many iris buds and lupine stalks. She even gave my eggplant a nice hair cut before I even had it out of my plant box. At least I decided this year I wasn't going to fuss over what came up. If it can survive Charlotte, more power to the plant. I did decide to Charlotte proof my veggies and put chicken wire up around them so we would at least get some veggies this year.
Next week I hope to finish the last of my garden projects which include finishing my patio corner area, finding a home for the last of my gnomes, adding the last bit of garden art and redesigning some of my planter boxes.
I will leave you with a few photos of the garden pest and her wild antics.
| My Japanese Maple is starting to leaf out. In the fall it turns a beautiful orange/red color. It is a species that does really well in containers and stays relatively small. |
This past weekend I purchased 9 bags of soil and tons of plants and veggies to start my gardening. Although we had pretty nasty weather on Sunday I found motivation between rain storms and ran outside while the sun was out and finished more than I thought.
Sunday I planted my veggies for the year: sungold, brandywine and early girl tomatoes, bush beans, zucchini, butternut squash, eggplant and some marigold to deter pests from eating my plants.
| My potatoes are already poking up through the soil and compost from when I first planted them last month |
| Now I will bury them back up completely and continue this process until the whole container is filled with soil and compost. |
| The veggie garden. Last year we added too many plants to this small space. This year I think I planted the bed just full enough. |
I also hung a beautiful hanging basket and planted some impulse buy flowers to make some flowering pots that will hopefully attract the hummingbirds. I will take a photo of it when its not raining outside.
While I was out in the garden I discovered a new garden pest. Gardeners already have deer, slugs, aphids, squirrels and rodents to deal with. I think I found one of the most destructive pests of all and she goes by the name of Charlotte! Being a puppy she likes to dig in the dirt and mud, which is no big deal. She also like to snip off blooming tulips and daffodils and jump into plants and destroy them. She has already ruined many iris buds and lupine stalks. She even gave my eggplant a nice hair cut before I even had it out of my plant box. At least I decided this year I wasn't going to fuss over what came up. If it can survive Charlotte, more power to the plant. I did decide to Charlotte proof my veggies and put chicken wire up around them so we would at least get some veggies this year.
| There she is, the anti-gardener. |
I will leave you with a few photos of the garden pest and her wild antics.
| Jumping up onto the porch |
| She loves rolling in the grass. This day she was eating a pineapple top while rolling. |
May 02, 2011
Softball and Sunshine
![]() |
| Sun bathing |
This weekend we finally had a break in the rainy weather this Sunday and had sunny 70 degree weather for most of the afternoon. I had planned to spend the whole day with Charlotte in the yard working on building a corner patio area and fencing in my veggie garden but when the sun came out Charlotte and I found ourselves basking in the sun rays. I did accomplish to fix a few loose fence boards and lay 4 of 13 cement blocks for my patio area but that was about it. Charlotte on the other hand fell asleep in the grass and spent most of the day this way.
Around noon Charlotte and I joined our friend Brandy and her family and watched an IM softball game at OSU. Charlotte had everyone falling in love with her. She is going to be a heartbreaker. With all the nice weather I managed to get a little sun burned....on only half of my face. It looks a little silly right now.
Anyways, I'm sorry this isn't the most exciting post I've done. I did finish a few more dog bandanas today for Charlotte. Hopefully I can get her outside and have her model them for me. I do have some blog inspirations I want to post. Hopefully I will get the chance to do so soon.
April 25, 2011
D.I.Y Suitcase Dog Bed
For the last five months or so I have been on the hunt for a large vinyl suitcase large enough to make a dog bed out of. I haven't had any luck until a few weekends ago when I was in Portland with Amy. She spotted a large blue suitcase while we were at an antique store. I snatched it up right away because it was the perfect size and I didn't know if I would be able to find another. I finished the dog bed about a week ago but now that Charlotte has entered the house I haven't had very much time to myself in order to finish posting this blog.
I really liked the shade of blue but its going to stay in the bedroom and blue didn't match anything else in the room so I bought a can of Behr High Drama red paint to paint the suitcase a color to coordinate with the existing red in the room. I also bought four legs 4" high to hold up the suitcase.
The first step was to remove the top piece of the suitcase. If you are going to do this, I suggest finding a suitcase that is assembled with screws. Mine, I found out used a type of heavy duty brad that were very difficult to remove. I damaged the suitcase a little bit trying to remove them. So for appearance and time management, I would strongly suggest picking a suitcase that is easy to disassemble.
After semi-successfully removing the top lid of the suitcase I measured where the legs would go on the bottom. Using a marker I placed dots at each corner where my legs would attach and then used the screw driver to drill my holes for the screws. The legs I chose already had screws attached to them so after drilling my holes I tightened the legs onto the bottom and then used nuts to keep them in place on the inside of the suitcase. I also added a little bit of gorilla glue onto the legs so I knew they wouldn't go anywhere.
Next came the fun part of painting the suitcase. The Behr paint I chose already had a built in primer so I did not prime my suitcase. Being careful not to paint the hardware I slowly applied my first coat of paint. Because it is a vinyl covering the first coat of paint went on very thin. Also because I was using red paint the first coat looked more pink than anything. I let the paint dry for 24 hours and then painted the second coat. Total it took 3 coats to cover the suitcase completely as well as get a nice deep red.
After the 3rd coat of paint was dry I used a small amount of metallic silver paint to go over the metal hardware and give it a clean, new look.
The final step consisted of finding a fluffy material to fill the suitcase. I had some chair foam and an extra pillow that I stuffed inside and than added a matching, soft fabric over the top so puppy will have a nice place to rest her head.
| This large blue suitcase is perfect for the frame of my doggie bed |
I really liked the shade of blue but its going to stay in the bedroom and blue didn't match anything else in the room so I bought a can of Behr High Drama red paint to paint the suitcase a color to coordinate with the existing red in the room. I also bought four legs 4" high to hold up the suitcase.
| 4" legs found at the local hardware store |
The first step was to remove the top piece of the suitcase. If you are going to do this, I suggest finding a suitcase that is assembled with screws. Mine, I found out used a type of heavy duty brad that were very difficult to remove. I damaged the suitcase a little bit trying to remove them. So for appearance and time management, I would strongly suggest picking a suitcase that is easy to disassemble.
| A little bit of damage from removing the hardware from the top of suitcase |
After semi-successfully removing the top lid of the suitcase I measured where the legs would go on the bottom. Using a marker I placed dots at each corner where my legs would attach and then used the screw driver to drill my holes for the screws. The legs I chose already had screws attached to them so after drilling my holes I tightened the legs onto the bottom and then used nuts to keep them in place on the inside of the suitcase. I also added a little bit of gorilla glue onto the legs so I knew they wouldn't go anywhere.
| Pre drilled leg holes |
Next came the fun part of painting the suitcase. The Behr paint I chose already had a built in primer so I did not prime my suitcase. Being careful not to paint the hardware I slowly applied my first coat of paint. Because it is a vinyl covering the first coat of paint went on very thin. Also because I was using red paint the first coat looked more pink than anything. I let the paint dry for 24 hours and then painted the second coat. Total it took 3 coats to cover the suitcase completely as well as get a nice deep red.
| I used a semi-gloss to achieve a slightly shiny finish |
After the 3rd coat of paint was dry I used a small amount of metallic silver paint to go over the metal hardware and give it a clean, new look.
| Repainting the hardware updated the look of the suitcase |
The final step consisted of finding a fluffy material to fill the suitcase. I had some chair foam and an extra pillow that I stuffed inside and than added a matching, soft fabric over the top so puppy will have a nice place to rest her head.
| Sock monkey fabric was used as the puppy comforter |
I added a new little puppy to complete the dog bed. She's still a little small to jump in the bed for now. In a few weeks I know she will be able to get inside but until then she will keep sleeping with mom at night.
| Charlotte in her suitcase bed |
| She loves her sock monkey blanket |
| Its so comfy she's ready for a nap already |
April 22, 2011
C is for Charlotte
Well the Easter bunny came a few days early at my house this week and delivered a beautiful Boston terrier puppy last night. I didn't think I would get a puppy until June but I found the perfect little girl and brought her home to join our family. When I went to look at puppies I didn't know how I would decide which one to take home but she made it very easy to pick her. She came and sat right in my lap and cuddled up next to me. It melted my heart right away. She had a great first night and was much easier to care for than I had thought. I am so excited to have her with us. She loves the outdoors and is a total goofball. I will take more photos and update everyone on how she is adjusting soon. Gotta get back to work!
April 18, 2011
So little time...
I started my weekend with big plans of working in the yard and traveling to Portland to visit my soon to be Boston Terrier puppy. Unfortunately the weekend had different plans for me. On Wednesday I hurt my back some how while I was cleaning the house. It probably happened while I was assembling my new IKEA shelf (photos will be posted soon). So my plans to finish the patio corner didn't happen because I was afraid I would agrivate my back more if I did any heavy lifting. Instead, I planted a few starts and spread my poppy seeds in the side beds. I also trimmed some of the plants in the courtyard/patio area outside our livingroom. I was surprised because more plants are coming back than I thought.
The daffodils are in full bloom right now
Purple and white tulips mixed with daffodils
The pansies lasted the whole winter and are still blooming
Lamium is growing and blooming already
My trunk filled with spring flowers
Also this weekend I planned to visit CeCe the mamma dog that hopefully will give birth to my new puppy this spring. As life goes, not everything goes as planned and we had to reschedule for another day. I wasn't sure how to spend the rest of my day so I went to the hardware store and bought supplies to make my new dog bed out of the trunk I bought at the Antique Store last weekend with Amy. I also finished some doggie bandanas I have been working on for a while and posted them on my etsy site. Here are some of them below:
Amy's pup Porter is sporting the All American Bandana
I made them to slip over a dog's collar to avoid the extra weight of tying them around the neck
Porter was a good sport and sat very still. Good job Amy on training this cutie.
You might remember Joey. He was wearing this bandana in one of the Schmidt's emails a few weeks ago. (If you don't know what I am referring to you can go to schmidtsgardencenter.com and view previous emails and sign up for great gardening advice)
Of course I had to make a OSU bandana
I have a lot more designs that I need to post online. I plan to get to it soon. My photos didn't turn out as nice as I wanted so I am going to reshoot them this week.
April 12, 2011
Misadventures of Tri Met
This past Sunday I was in Portland hanging out with my friend Amy. Normally when we get together we are either crafting or buying new items to make crafts in the future. This trip was no exception. After I got to her apartment we headed to IKEA where we both went on a shopping spree. I bought tons of stuff to help me declutter my room. We just barely fit everything into the car. The hardest part was fitting a 6 foot shelf into my not so spacious trunk and back seat. I don't think I could have figured it out without my girl. She shoved that shelf into the car like she does this all the time. She had to give up the front seat in order to get it in but we did it! We stuffed the trunk, the back seat and the front passenger seat. If that wasn't impressive enough we also found more goodies at a second hand store that we had to wedge into the front seat.
My trunk was too full after visiting IKEA
The last box for the shelf had to be positioned above the front seat and the back window. It looks dangerous but it was so well wedged in there it didn't move an inch.
I had to chauffeur Amy around after IKEA because she didn't fit up front.
Amy peeking out from the back seat in between boxes
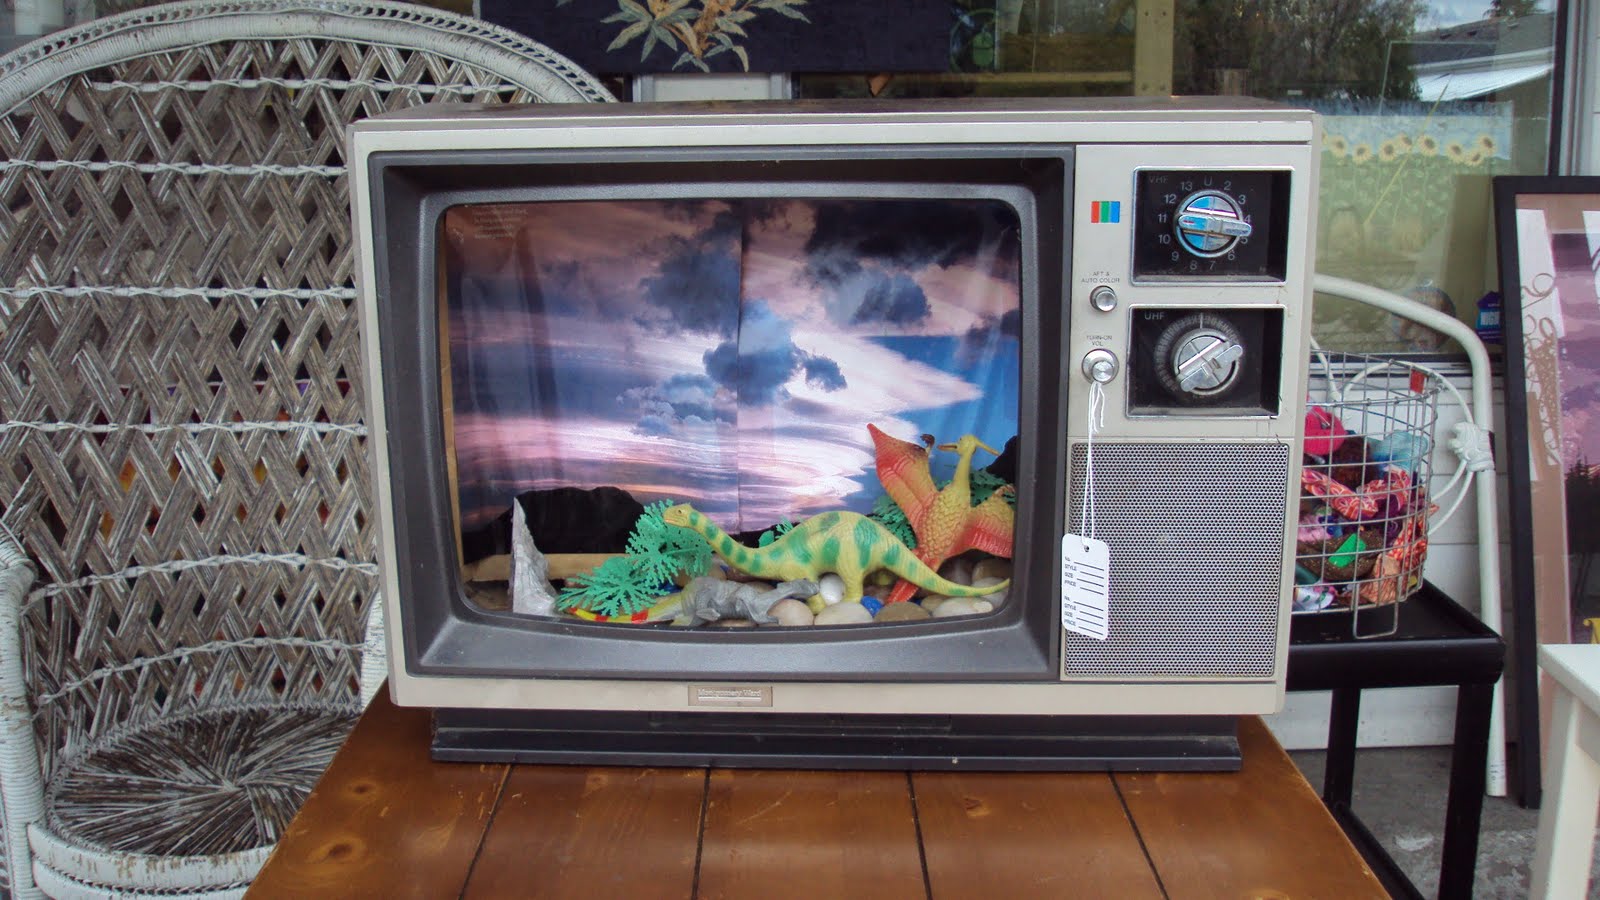
Also at the antique stores we found some really interesting items like this old TV with dinosaurs in it
We found this framed Lord of the Rings Legolas poster
I also found this nifty horned dragon hat thing
After our shopping expedition we went down to Powell street to find this cider brewery. Since the car was stuffed to the brim we decided to take the bus through town since it was a straight shot from Amy's house to the brewery. What should have been a 20 minute bus ride turned out to be a bus ride plus a 45 minute walk because we accidentally got off at the wrong stop and thought it would only be a few more blocks to where we were going. It turned out we were a lot farther than we expected and ended up walking down Milwaukee street for 3.5 miles. We both earned a few blisters and some sore muscles but it was a nice day and we found some interesting sites along the way.
We passed this neat little coffee shop on the way
I spotted a garden gnome in some one's front yard
This was a candy shop that looked like a life size ginger bread house
A welcome sign to this shop
It was a winter wonderland
At this point we were about half way to our destination and were contemplating paying this little boy to push us in his wagon the rest of the way
We finally made it to Bushwhackers!
We didn't know the cider place didn't serve food so after our hard cider we walked farther down 12th street and found these awesome food carts. We had some burritos and delicious crepes for dessert.
After we ate it started to rain so we hopped back on the bus and rode it successfully all the way back to Amy's house.
Subscribe to:
Posts (Atom)


